This page breaks down how I approached creating an enemy targeting system in Unreal Engine 5.

Overview
Continuing with my progress on creating a 2000’s era beat em up game in Unreal Engine 5, I decided to create an enemy targeting system which would allow the player to focus on one particular enemy during combat sequences before moving onto the Enemy AI.
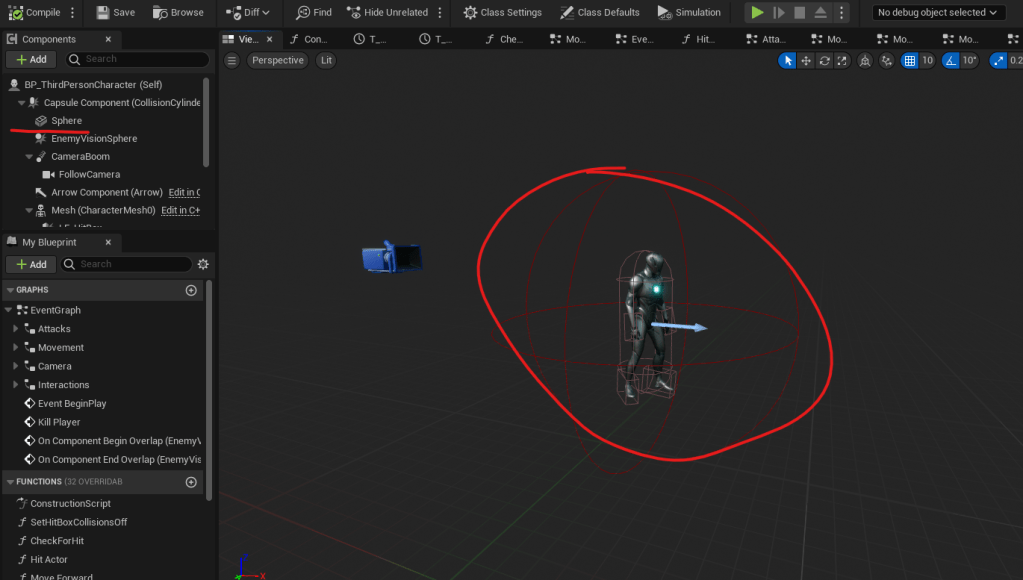
The Vision SPHERE
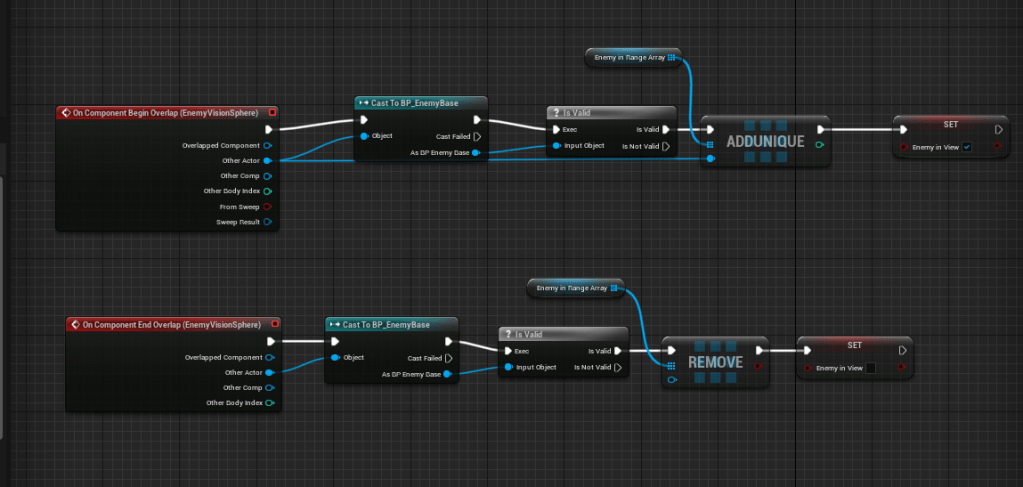
First, I just created a sphere that will be used to detect if the player is in the presence of an enemy or not. If the actor that overlaps the sphere is an enemy (deriving from the BP_EnemyBase blueprint), then I will add it to an Array on the player character called EnemyInRangeArray, as well as turn on a boolean called “EnemyInView”
When the enemy character ends overlapping the Sphere, it will remove itself from the array and turn off the boolean if there are no enemies in view.
Setting The Array INDEX
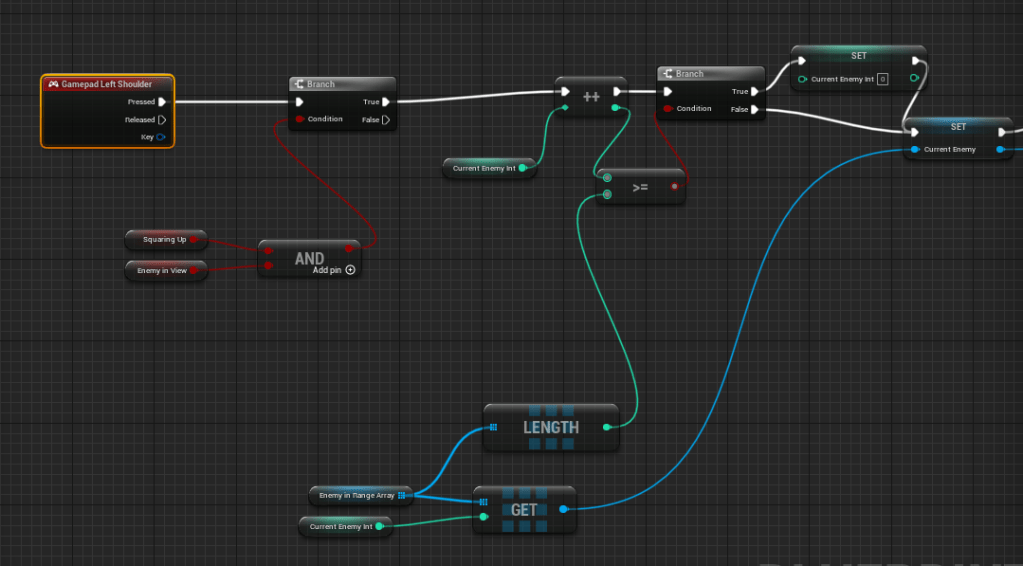
I created an integer called CurrentEnemyInt which will be set to zero whenever the player hits the right trigger button which is the “Square Up” button. I’ll go more in depth into what this is in an animation article, but basically, it’s just an animation for the player to “put up their dukes” so to speak.
The magic really happens when the player has a few enemies in the EnemyInRangeArray while Squared Up. On pressing the Left Shoulder button, the player blueprint checks a few booleans. First, it makes sure you are squaring up, then it checks if there is an enemy in view.
If both of those things are true, it will increase the CurrentEnemyInt (provided that it is not above the length of the EnemyInRangeArray) and then get a copy of the array, and set the CurrentEnemy (an actor variable on the player BP) to the array element grabbed in the copy of the array.
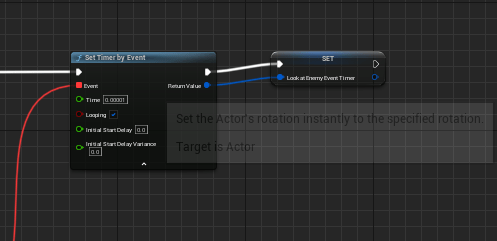
From there an event called Look At Enemy is called. This event just finds the CurrentEnemy and gets the players rotation to face it, using the FindLookAtRotation node.

It should be noted that this event is on a timer, so that it doesn’t have to be called on Tick. (It’s reset when the right trigger is released).
From here, the system uses the CurrentEnemy variable to determine whether or not to show a target indicator above the enemies head.
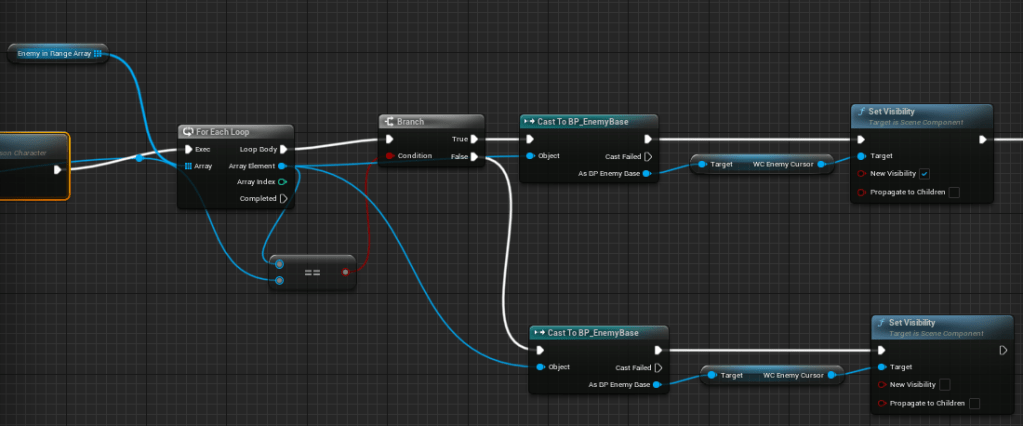
Target Indicators
The target indicators are Widget blueprints that appear above the enemies head when they are being targetted by the player. Their set up is quite simple, and they use generic icons from Game-Icons.net for now.
First, I created a Widget Blueprint called W_EnemyCursorWidget. This Widget only contains the image obtained from Game-Icons.net, no canvas necessary.

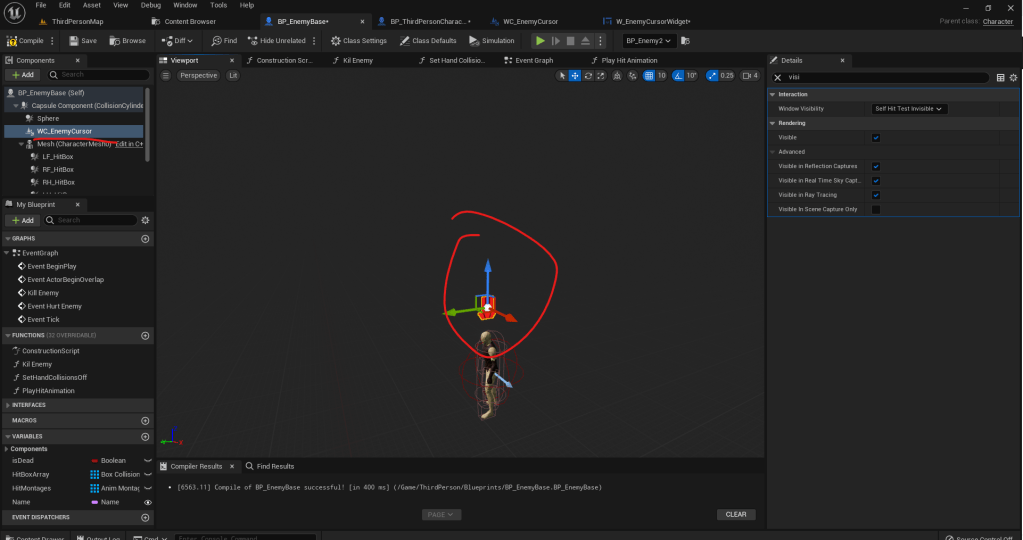
I then created a Widget Component called WC_EnemyCursor. This is the component that will hold the Widget Blueprint that was just created, and get added to the Enemy Blueprint. Inside of the WC_EnemyCursor, I just made the widget class set to the W_EnemyCursorWidget.
The next step was to add the WC_EnemyCursor component to my Enemy character and position it the way that I wanted In this case, I want the widget to appear above the head of each enemy character, so that’s what I did.
I wanted to make sure that the enemy cursor always faces the player, so I added a bit of code that runs on tick to make sure that the cursor is always facing the player. This uses the Find Look At Rotation node as well. This is the current implementation, but I might change this to make sure the cursor is always facing the camera instead — it might be a bit of a better way to go!
RESULTS
And the final results!
