This page breaks down expanding the pick up system to include allowing the player to equip weapons.

Overview
Prior to creating enemy AI, the next step I wanted to tackle was creating a flexible weapon pick up system. The requirements here were that the player needed to be able to pick up a weapon, and equip / unequip that weapon on the fly.
NOTE: Before you proceed, please check out the article about my PICK UP SYSTEM, as I will not be going over the way I created the base pick up system, which is the basis for the weapon pick up system.
THE WEAPON PARENT
Similarly to how I created the Pick Up Parent item, I created a BP_WeaponBase actor that will serve as the base for all weapons. Inside of this actor, I added two variables. One of type Static Mesh called WeaponToEquip and another of type Texture 2D called WeaponImage. Both of these variables are set to Instance Editable.
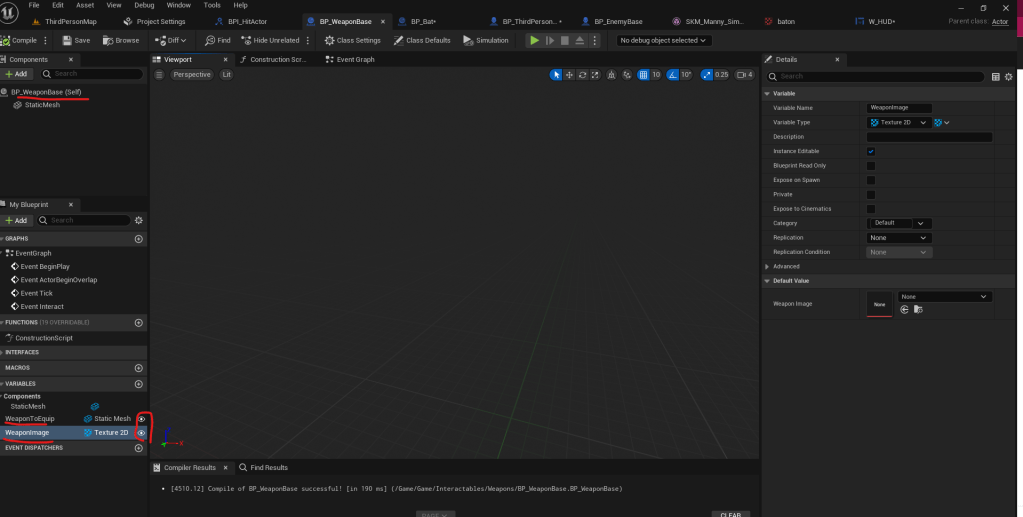
In the Construction Script for the weapon base, I simply set the StaticMesh component to be the same value as our WeaponToEquip variable. This is important to allow the player character to actually pick up the correct mesh when the interaction is performed.
The last step (but it’s an important one) is to add a delay between calling the interact event and the destroying of the actor that happens when the player interacts with the item. This is because if not, Unreal Engine will throw an error and not allow the item to be equipped. The delay is just .1 seconds long.

THE WEAPON CHILD
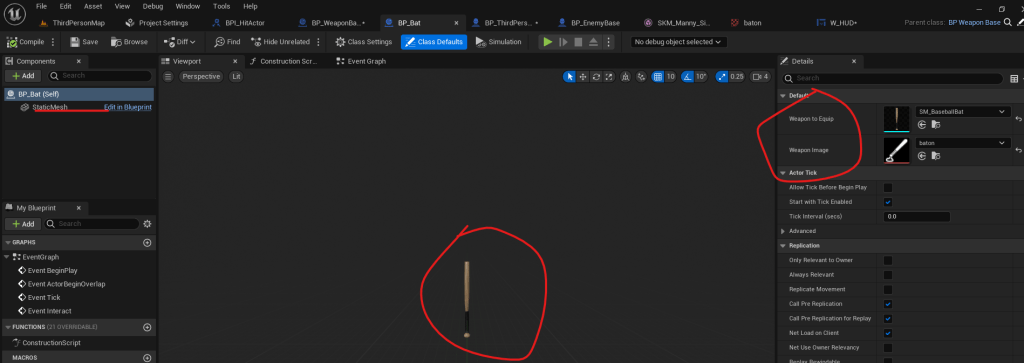
From there, I created a child actor, which I will call BP_Bat. Assigning values to the WeaponToEquip variable as well as the WeaponImage variable. The WeaponImage variable is just a generic icon I got from GameIcons.Net, which will be used in the UI to show that the player is holding a weapon.
The WeaponToEquip variable in this case is called SM_BaseBallBat. Since the Construction Script is inherited from the BP_WeaponBase actor, the baseball bat will be populated into the viewport once you assign that mesh to the WeaponToEquip variable.
UPDATING PLAYER BLUEPRINT
Now, there needs to be a few things added to the player blueprint in order to get this to work.
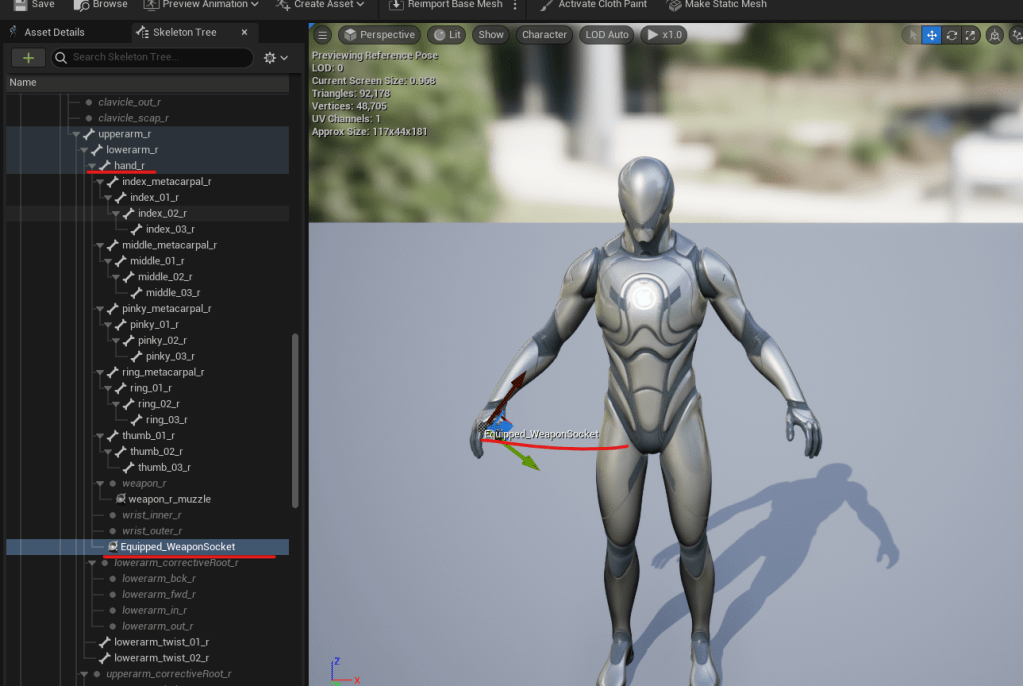
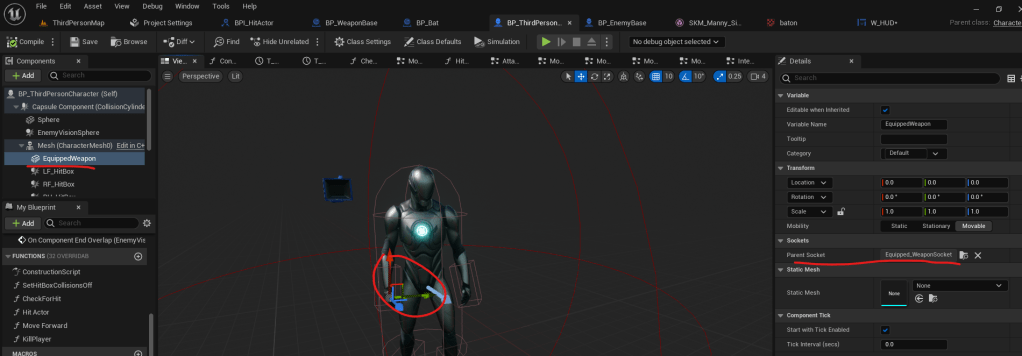
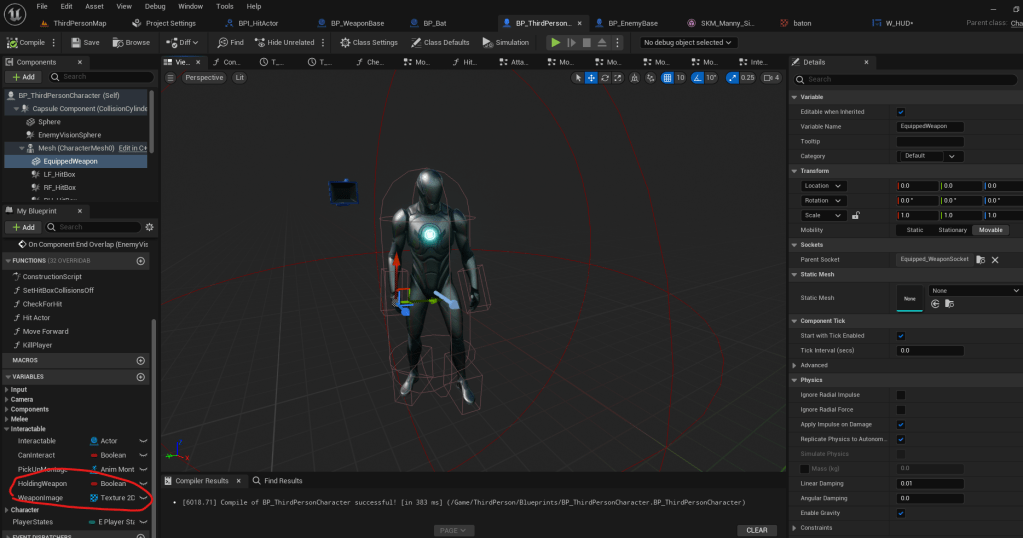
First, I added a new Static Mesh component to the player character (as a child of the CharacterMesh) and called it EquippedWeapon. This mesh will be parented to a new socket on the SkeletalMesh that I called Equipped_WeaponSocket. I personally parented this new socket to the right hand since I want the player to equip items in their right hand.
Note: The animation I’m using has the player pick up the item from the left hand… but I won’t use that animation forever, so ignore that for now!!
I also added two more variables to the player character. A boolean called HoldingWeapon and a Texture2D called WeaponImage.
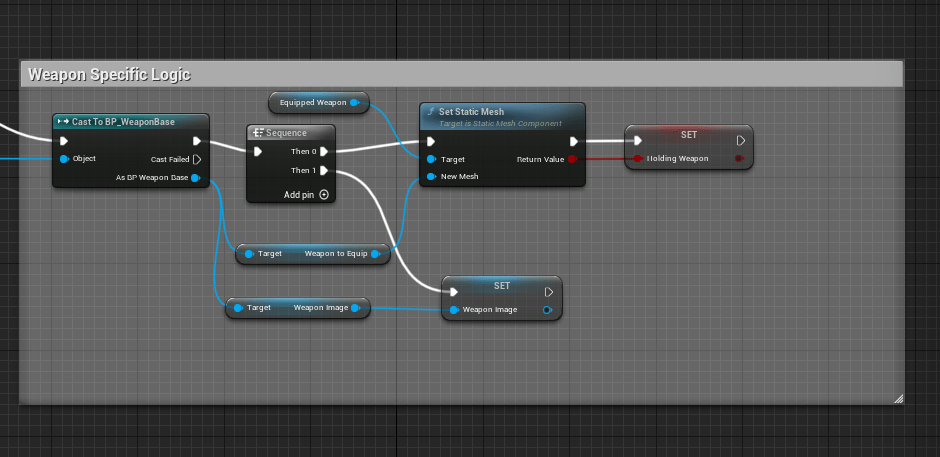
From here, the next step is to add logic to the interaction function that will allow the player to pick up there weapon. This is fairly simple, I just take the interactable and cast to the BP_WeaponBase, and in sequence I grab the WeapnoToEquip mesh, set it to the EquippedWeapon mesh on the player, and do the same for the WeaponImage from the BP_WeaponBase actor (just assigning it to the WeaponImage variable on the player character). I also set the HoldingWeapon Boolean to True.
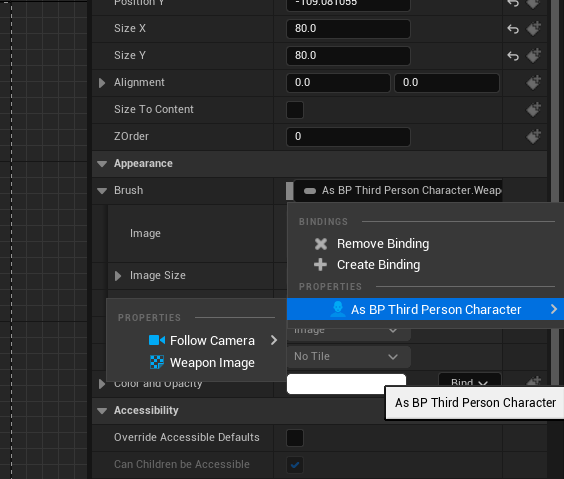
UI INDICATOR
This step finally makes use of the lower left image icon I have had at the bottom of the screen since I started building this!
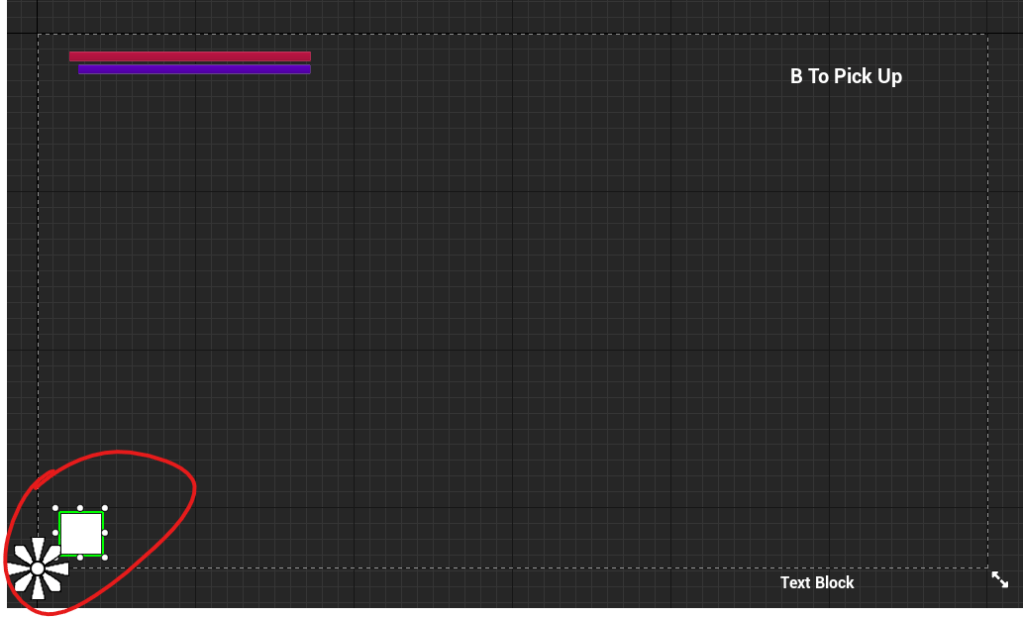
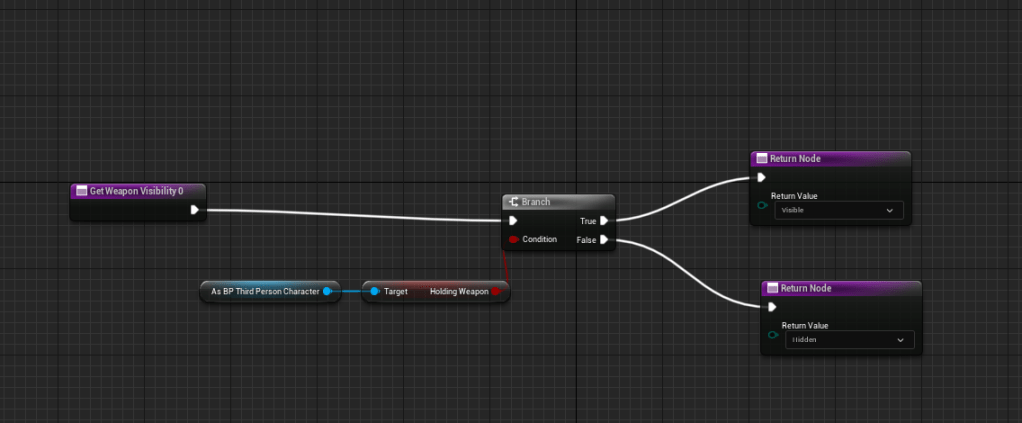
This is the simplest part of the implementation. Essentially, I bind visibility of the icon to the HoldingWeapon boolean on the player character. If the player is not holding a weapon, it will disappear.
Then, I just bind the brush to the WeaponImage variable on the player character!
Unequipping / Requipping
The last step is to allow the player to unequip a weapon on the fly. I binded that action to the right shoulder here, and all it does for now is disable the EquippedWeapon mesh and set HoldingWeapon to false (if the EquippedWeapon is valid).
RESULTS
There are a few more things I will add to this functionality (allowing the player to drop a weapon, and replace a weapon by picking up another one, as well as weapon specific animations) that will be documented in another article. But for now, here are the results!
